JD-Next Required Pretest Guide
The Required Pretest is to ensure that prior to the official test, you have logged in to LifeJourney, downloaded and installed necessary lockdown browser software, completed the ID validation process, and familiarized yourself with the testing platform.
You are required to complete the JD-Next Pretest to be eligible to take the JD-Next Test.
The Required Pretest dates can be found in your course.
Please allocate approximately 30-45 minutes to complete the Required Pretest before the deadline.
It is important that you complete the Required Pretest using the same device which you plan to use for the JD-Next Test. It is also highly recommended that you use the same network/internet connection and location that you plan to use during the test.
Getting Started
Check List
- ☐ Log in to LifeJourney
- ☐ Add your test code
- ☐ Complete ID Validation
- ☐ Download and install Lockdown Browser
- ☐ Take the Required Pretest
System Requirements
Respondus Lockdown Browser is a client application that is installed to a local computer.
| Recommended Requirement | |
|---|---|
| Webcam | Required |
| PC | Windows 11 & 10 (“S mode” and “SE” are not compatible) |
| Mac | MacOS 10.15 to 15.0+ |
| Chromebook | ChromeOS* |
| Internet download speed | 6 Mbps |
| Memory | 4 GB RAM |
| Hard Disk Space | Windows: 200 MB of free hard disk space Mac: 200 MB of free hard disk space |
*Note about Chromebook Support: It is not recommended to use Chromebook for the JD-Next Test if you have an alternative option from the supported list above. If you do not have an alternative, please review the following additional specifications and recommendations for Chromebooks.
- LockDown Browser for Chromebook minimally requires the version of ChromeOS that Google makes available via their Long Term Support (LTS) channel. For more information, visit: Long Term Support Channel Update for ChromeOS.
- Respondus recommends keeping Chromebooks updated to the most recent version that is available via Google’s ChromeOS “Stable” channel: Stable Channel Update for ChromeOS / ChromeOS FlexS.
LIFEJOURNEY
Logging into LifeJourney

The testing platform, LifeJourney by Territorium, is where you will create an account for the Required Pretest and official test.
- Go to LifeJourney
- Enter User and Password and select Log In.
Tips and Suggestions
- The JD-Next Team will email your user info for the Required Pretest prior to the Required Pretest start date, including your temporary password and Test Code. Your User Name is the email address you use to access the course. Be sure to check your spam/junk folder.
- Update your Password prior to testing by selecting Forgot Password
- NOTE: Do not create a new account, your account has already been created.
Adding Your Test Code

On your LifeJourney homepage, you’ll see the option to "Add test code."

Select "Add test code" and enter the test code provided in the Aspen Publishing email. After successfully entering the test code, select "Take me to the test."
Note: You will only enter your test code one time.

If the test start date and time is in the future, the bottom of the screen will show "Test not available yet," click on home to return to your home page.
The test tile will have the status "Test window hasn’t opened," and include the date and time the window will open.

The test tile status will change to "Start" when the window is open.
Permissions & Requirements
The first time you log in to the platform, the browser will ask you to allow webcam and location, both are required.
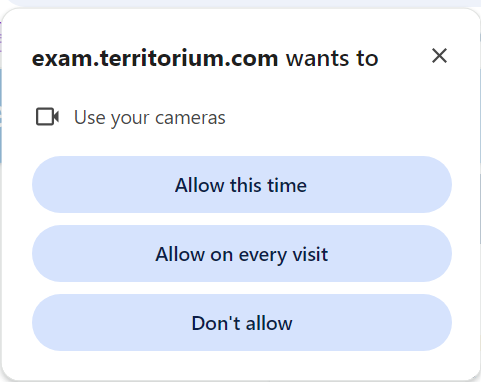
You will be prompted to share your camera. Click the button "Allow on every visit" to continue the process.
Your camera will need to be on during the Required Pretest and the Test.

Then, you will be prompted to share your location. This is required for testing, select "Allow."

Gelocation required and permission both must be Yes in order to launch the Pretest or Test.
If you need additional information on enabling your geolocation, select "Instructions for enabling location access."
PHOTO PROCESS
The next screen is an overview of the Required Pretest, photo & identification validation process, and ‘Respondus LockDown Browser’ requirements.

Take Your Photo

Scroll to the bottom of the screen and select "Start Photo Process."

Step 01
Photo Capture
Be sure to read and follow the instructions for capturing a quality image. Make sure you have a working webcam.
-
Select "Next" to begin the process and activate your webcam.
-
Utilizing your webcam, select "Take Photo." Make sure the picture is clear. You can take a new picture by selecting "Take new picture."
-
When satisfied with the picture, click "Continue with the process."
Suggestion: Take the picture in the same location where you will take the test to aid facial recognition during the test.


Step 02
Capture ID Photo
Select Next to start the ID capture process.
-
Select "Next" to begin the process and activate your webcam.
-
While continuing to use your webcam, hold your ID up to the camera ensuring it fits in the yellow frame and is a clear image.
-
You may also upload an image of your ID by clicking "Browse."
Suggestion: Take the picture in the same location where you will take the test to aid facial recognition during the test.

Step 03
Submit the photo and ID for validation
At this point review both images and determine if they meet the requirements.
Either select "Take new picture" for a new photo of your ID or select "Continue with the process" for your identification validation processing.
Possible Errors

If for some reason there was an error in the validation process, you will receive a pop-up message.
-
Select "Restart Capture" to begin the photo process again.

Two failed authorization attempts will result in the option to Request manual verification. You can select this option or try the automated process again.
APPROVAL PROCESS
Individuals who requested a manual verification will have a Pending photo approval status at the bottom of the screen. Proctors will review all "Request manual verification" requests; you will be notified via email if approved or rejected. Check your spam/junk folder for an approval or rejection email.
Note: Manual ID validations are reviewed and approved/rejected during Required Pretest support hours only.
Approved:
-
Your screen will show a "Success Validation" pop-up when your photo and identification validation process has completed successfully.
-
After successfully completing the photo capture and ID validation, select "Finish" to move to downloading and installing the LockDown Browser in the next section.
Approved individuals will be able to move on to the LockDown Browser step.

Rejected:
-
Those with Rejected photo/IDs will have the opportunity to start the process over.

INSTALLING RESPONDUS LOCKDOWN BROWSER

The Respondus LockDown Browser is a client application that is installed to a local computer.
-
Select either the ‘Download for Windows’,‘Download for Mac’ or 'Chromebook Extension' based on your testing device.
- For supported version see Recommended Requirements at the top of the document.
- Link to Chromebook Extension instructions
-
The file will be saved to your default download directory. Once downloaded, click to execute the installation file.

-
When prompted to allow the app to make changes to your device, select Yes.
-
Note You will need administrator privileges on your device.
The installation will go through several steps
Using LockDown Browser
When the LockDown Browser installation is complete, you will return to the Instruction page, select "Start!" to begin the Required Pretest.

Select "Open LockDown Browser OEM" when the pop-up message appears.

You will be asked if you want to allow this app to make changes to your device, select "Yes."


The LockDown Browser will load and prompt you to close any open programs.
Click "Close Process" for each program.
Once you have closed all the open processes, you’ll be set to start your test!
Note If you are running on battery power you will receive a warning; if possible, have your device attached to a power source while taking the test.

If you are a Mac and iPhone/iPad user and Continuity Camera is enabled and you haven't shut down or put your device(s) in airplane mode, you will receive the following message. At this time, click Ok, and then you will need to completely log out of the testing platform. Turn your devices off or put them in airplane mode and then sign back in and continue the process.
TAKING THE REQUIRED PRETEST

Click "Start" to begin the camera validation process. Once your camera is activated, a live image will be captured and compared to the information on file. During this process, your screen will display a "Please Hold" message.

If your camera fails to activate or the image cannot be confirmed, you will be prompted to exit the test and contact the chat support team for troubleshooting assistance.

Testing will officially begin once the camera has been successfully validated.
Completing Your Required Pretest
Within the test, you will have some basic navigation and information.

Across the top is the "Name of the test, name of the section, your start and end time, and time remaining."
Clicking "View Documents" next to the time will open the View Documents window.
Note: Selecting the JD-Next course text will open it in a separate tab for reference during the test. For the Required Pretest, the Candidate Statement is available to help you become familiar with the functionality.

Along the bottom are the "Previous, Mark for review, and Next" navigation options and the question count. Items that have been answered will be marked green, you can return to those items to review and change your response.
Note: If there are items you want to mark to review later, select "Mark for review" and the "question number", these will be outlined in orange. The "Previous & Next" will move you through the questions.

In the bottom right corner will be your image as it is recorded through your webcam. The image can be moved to any location on the screen or closed.
Note: Closing your image will not stop the webcam from recording you. If you close or cover your webcam during the test, this will be seen as a test violation.
Once you reach the last question, the navigation buttons will change and "Next" will be replaced with "Finish."

If you click on "End" or "Finish," you will be prompted to "Submit and continue." You will be prompted to confirm: "OK" will submit; "Cancel" will return you to the "Submit and continue" screen.

The Accessibility and Chat icons are located in the lower left of the screen. Both of these can be accessed during the test.
Time Limit

If the time expires while you are still testing, a time expired message will appear.
Clicking "OK" will submit and end the section/test.
Note: Each section will include a "5-minutes remaining" warning. This will appear in the upper right-hand corner of your screen and will last 3 seconds.
After the Test

Congratulations on completing the test!
After successfully submitting your test, you will receive an email confirmation.